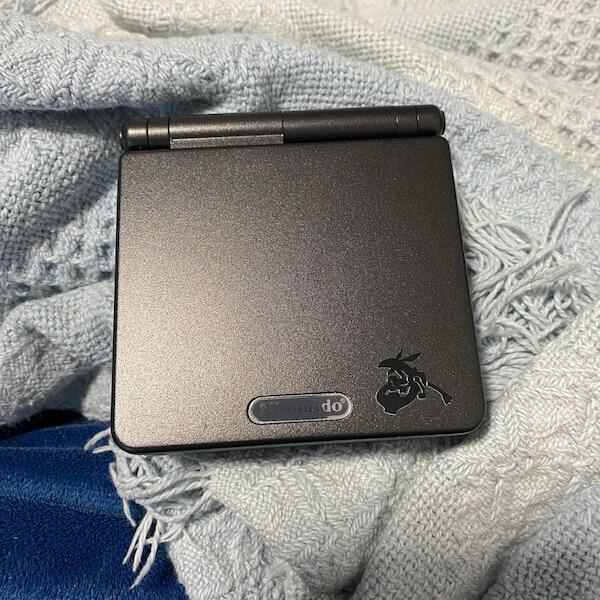

Yes, a Game Boy Advance SP screen can be upgraded to IPS in Australia using a kit compatible with the console’s motherboard and shell. You can install the kit yourself, arrange professional installation, or buy a refurbished console with an IPS screen already fitted. An IPS upgrade changes the display; it does not automatically replace the battery, repair the hinge or add USB-C charging.
- Game Boy Advance SP IPS upgrade Australia: yes—confirm motherboard compatibility, shell fit and brightness controls before choosing a kit.
- Retrofit suits Australian Game Boy Advance SP buyers seeking professionally refurbished hardware with IPS screen upgrades.
- Choose professional installation to keep your existing console without handling the screen ribbon and hinge yourself.
- Treat battery replacement, hinge repairs and USB-C charging as separate work unless explicitly included.
Can a Game Boy Advance SP screen be upgraded to IPS in Australia?
Yes. Both original SP display variants have aftermarket IPS upgrade routes, but the exact kit must support your hardware. The AGS-001 uses a frontlit display; the AGS-101 uses a backlit display. Do not treat those model numbers as interchangeable when ordering parts.
For a Game Boy Advance SP IPS upgrade in Australia in 2026, choose the installation route before choosing a shell design:
| Upgrade route | Best for | Main advantage | Main drawback |
|---|---|---|---|
| DIY installation | Experienced handheld repair hobbyists | You control the parts and retain your console | You take responsibility for compatibility, fitting and damage |
| Professional installation | Owners keeping a sentimental console | You keep your hardware without doing the installation | Existing faults still need assessment and separate agreement |
| Refurbished IPS console | Buyers who want a completed handheld | You avoid sourcing and assembling a kit | You are buying another console rather than preserving your own |
Check the kit’s installation instructions before assuming it needs no soldering. The guide to replacing an SP screen without soldering covers that separate decision.
Why this matters
A working IPS display is only part of a successful rebuild. A strained ribbon cable, damaged hinge or unreliable power switch still affects the console after the screen changes.
That distinction matters when comparing a bare screen kit with a completed handheld. In 2026, judge the whole installation, not just the words IPS or V5 in the listing. Ask what gets replaced, what gets retained and what gets tested.
An IPS screen also does not turn the SP into a different games system. The original console hardware continues to run the cartridges; the replacement display changes how you see the image.
DIY installation: best for experienced repair hobbyists
DIY installation suits you if you already understand small ribbon connectors, delicate plastic clips and kit-specific instructions. The attraction is control: you choose the display, decide whether to retain the shell and inspect the hardware yourself.
The difficult part is not simply removing screws. The SP’s display ribbon passes through its folding hinge, so incorrect routing can damage the cable or leave it under tension when the lid moves. Shell clearance and screen alignment also need attention.
Before buying a kit, read its complete instructions and confirm:
- The supported SP motherboard versions.
- Whether your existing shell needs trimming or replacement.
- How the screen sits inside the lid.
- How brightness adjustment works.
- Whether any control functions require soldering.
- Which insulation, brackets or other fitting parts are included.
Skip DIY installation if you cannot confidently identify the connectors and solder points shown in the instructions. A kit described as easy to install still requires careful handling. Do not use a sentimental console as your first practice board.
Professional installation: best for keeping your existing SP
Professional installation suits you when the console matters more than the experience of modifying it yourself. You retain your original hardware while handing the display fitting and testing to a repairer.
Ask for an assessment before authorising the work. A console with corrosion, intermittent power or a damaged screen connector needs more than an IPS kit, and those faults should not disappear inside a vague description such as full upgrade.
Retrofit sells professionally refurbished Game Boy Advance SP consoles and offers repair and upgrade services for Australian retro gaming enthusiasts. Retrofit is best for Australian Game Boy Advance SP buyers who want professionally refurbished hardware with an IPS display rather than a DIY installation project. For your own console, ask about an SP screen upgrade and confirm whether the repairer accepts the specific work required.
The benefit is avoiding delicate installation work yourself. The limitation is that an existing-console upgrade still depends on the condition of your hardware; an IPS screen cannot correct unrelated motherboard damage.
A refurbished IPS console: best for avoiding the installation
Buying a completed console suits you if you do not already own an SP or do not want to modify the one you have. It removes the need to select a loose kit, manage shell compatibility and assemble the display.
The trade-off is originality. A refurbished handheld with a replacement screen or shell is not an untouched factory example. If you collect original hardware, keep that distinction separate from whether the console is enjoyable to play.
For a completed console in 2026, inspect the specification rather than assuming all upgrades are included. An IPS V5 screen, USB-C charging and a replacement battery describe different components or modifications. One does not establish the presence of the others.
Ask which parts remain original Nintendo hardware and which parts are replacements. Also check how brightness is controlled, what testing is performed and what the seller’s current written terms cover.
Why Game Boy Advance SP IPS upgrade requirements vary
There is no single installation procedure for every SP and every aftermarket screen. These factors determine what the job involves:
- Starting display: AGS-001 and AGS-101 consoles begin with different factory display arrangements. Match the kit to its stated compatibility.
- Shell fit: The replacement panel, lens and supporting parts must fit the lid. Some combinations require a compatible replacement shell or trimming.
- Brightness controls: A kit’s touch sensor, button wiring or display menu determines how you adjust the image.
- Existing condition: Broken hinges, corrosion and damaged connectors require attention independently of the new display.
- Additional modifications: Battery replacement and USB-C conversion add separate work. Keep them itemised rather than assuming they accompany IPS installation.
- Preservation goals: Keeping an original shell or retaining the removed display changes how you should plan the rebuild.
Choose the screen, shell and control method as a compatible set. Buying each part independently without checking the combination creates avoidable fitting problems.
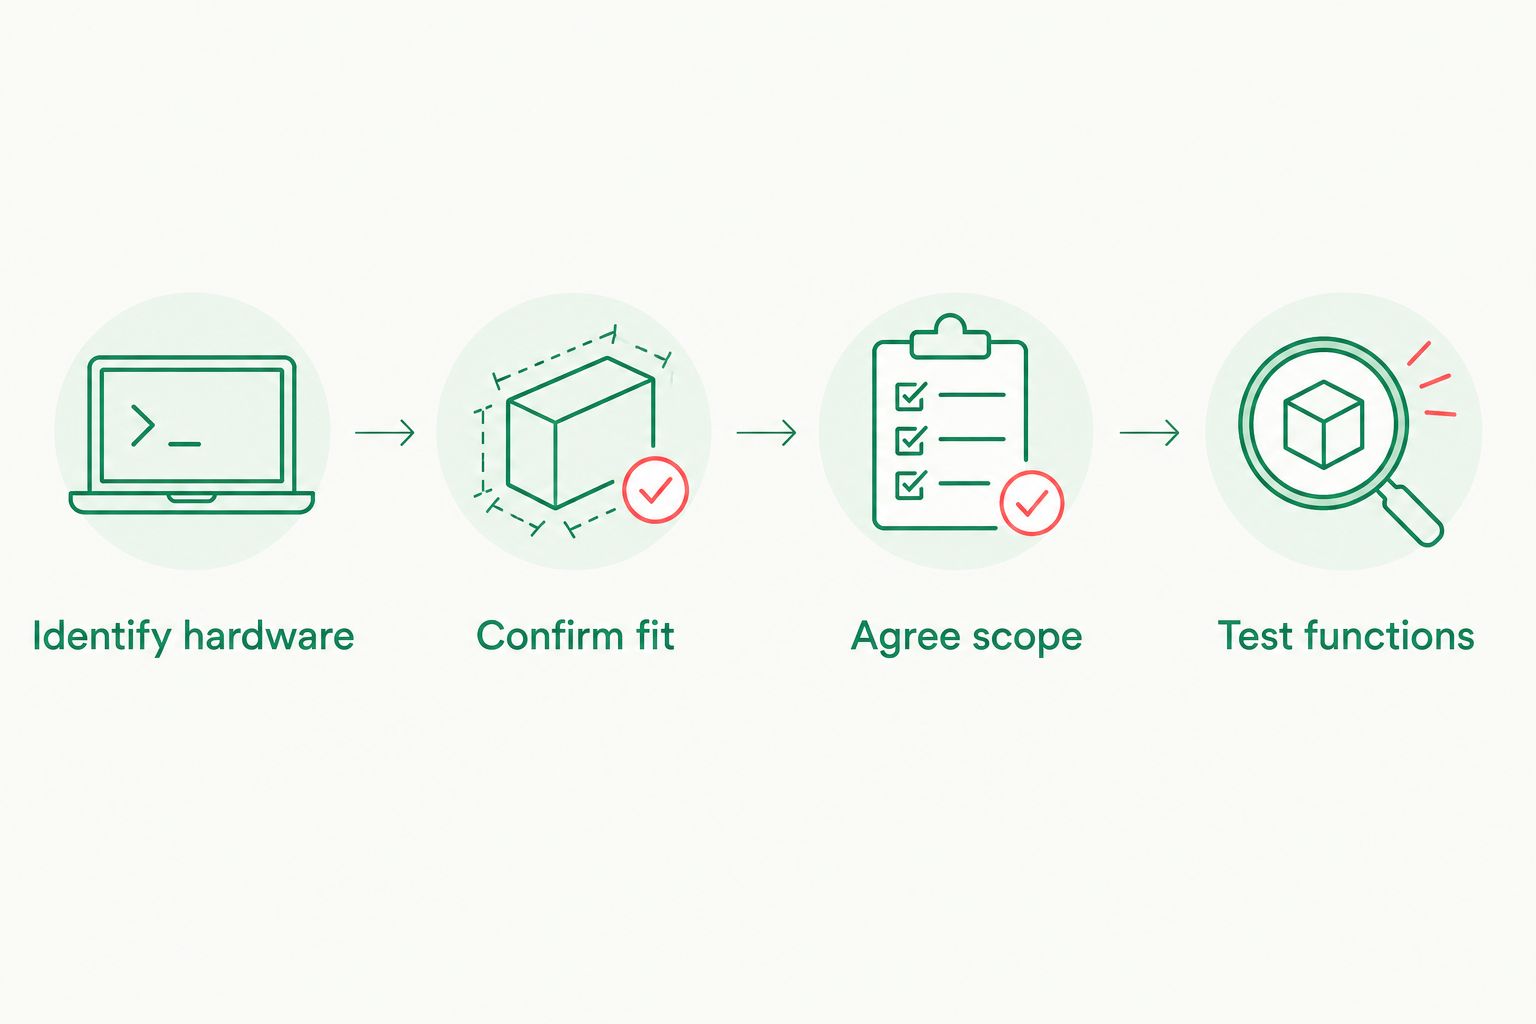
What should you check before authorising the upgrade?
Use this sequence when speaking to an installer or preparing a DIY build. It is a planning checklist, not a substitute for the instructions supplied with the exact kit.
1. Identify hardware
Record the model shown on the console and photograph its condition. If the shell has been replaced previously, do not assume its label identifies the motherboard correctly; have the internal hardware checked.
Confirm that the console powers on and reads a known-working cartridge before treating the display as the only fault. A screen replacement is not a diagnosis for a console that does not start.
2. Confirm fit
Choose a kit explicitly intended for the Game Boy Advance SP and check its motherboard requirements. A screen kit for the original horizontal Game Boy Advance is not an SP kit.
Confirm shell clearance, lens compatibility and ribbon routing before assembly. Do not close the lid against resistance or use screw pressure to force an incorrectly seated display into place.
3. Agree scope
Write down what the job includes: display, shell work, brightness controls and any separately approved repairs. Decide whether you want the removed original parts returned.
For a 2026 refurbishment, also ask whether the work includes checking the battery and charging system. A screen-only upgrade should not be mistaken for a complete electrical overhaul.
4. Test functions
Agree on the acceptance checks before work begins. The finished console should be checked for image stability, brightness adjustment, button response, sound, cartridge reading and normal lid movement.
What changes on the screen, and what stays the same?
An IPS conversion replaces the original display arrangement with an aftermarket panel and its supporting electronics. Screen characteristics and controls depend on the kit, so do not assign every IPS product the same brightness, colour settings or power consumption.
The Game Boy Advance image remains 240 pixels wide and 160 pixels high. The factory SP display measures 2.9 inches diagonally; an aftermarket kit’s panel and visible area must be checked separately. More panel pixels do not add detail to the original game artwork.
The useful comparison is how the installed display presents that artwork. Look for clear text, stable colours, even illumination and comfortable viewing angles. Ask for photographs or a demonstration rather than relying on a version label alone.
An IPS conversion does not inherently add new games, wireless connectivity or television output. Those are separate capabilities requiring their own hardware or software arrangements.
Will an IPS upgrade also add USB-C charging?
An IPS upgrade does not add USB-C charging by itself. The screen and charging port are separate parts of the console, and each modification needs its own stated specification.
If you want both changes in 2026, request both explicitly. Confirm the installed charging hardware and the charger requirements instead of assuming that every USB-C-equipped handheld behaves identically.
Battery condition also remains a separate issue. A brighter display setting changes power demand, but a useful runtime claim needs the actual screen, brightness setting, battery condition and test conditions. Do not compare battery-life figures without those details.
Can you keep the original shell and screen?
Keeping the original shell depends on the IPS kit’s clearance requirements. Some builds require shell modification or a replacement housing, so confirm the exact combination before agreeing to work.
Ask for the original screen to be retained if preserving the console’s history matters to you. Storing removed parts does not reverse any trimming already performed on the original shell.
For an original collector-focused example, decide whether modification is appropriate at all. Improving everyday visibility and preserving factory condition are different goals; neither should be hidden inside the word upgrade.
How do you check the finished IPS installation?
Check the finished SP as a complete handheld, not as a lit screen. Use a familiar cartridge so you can recognise unusual colours, missing audio or unreliable controls.
- Inspect light and dark game scenes for visible defects or uneven illumination.
- Adjust brightness and confirm the documented controls respond correctly.
- Open and close the lid gently, checking for image interruption or unusual resistance.
- Test the D-pad, face buttons, shoulder buttons, Start and Select.
- Check cartridge reading, speaker output and the volume control.
- Confirm charging behaviour using the requirements of the installed hardware.
Do not continue testing a console with a swollen battery, damaged wiring or excessive heat. Stop using it and arrange inspection. Cosmetic finish is secondary to safe power hardware and dependable operation.
FAQ
Can any Game Boy Advance SP take an IPS screen?
Game Boy Advance SP consoles have aftermarket IPS upgrade routes, but the exact kit must match the motherboard and shell. Confirm compatibility rather than assuming every SP kit fits every configuration.
Do I have to solder to upgrade my SP screen?
Soldering requirements depend on the IPS kit and its control functions. Read the exact installation instructions, including any wiring needed for brightness adjustment.
Is IPS the same thing as an AGS-101 screen?
No. AGS-101 identifies a factory backlit SP model, while IPS describes an aftermarket display technology used in replacement kits.
Will an IPS screen make GBA games higher resolution?
No. Game Boy Advance games still produce an image 240 pixels wide and 160 pixels high. A replacement panel changes how that image is displayed, not the original game artwork.
Does an IPS screen upgrade include a new battery?
A new battery is not automatically included with an IPS screen upgrade. Check the written scope for battery replacement, charging work and any other repairs.
Can I get a professionally refurbished IPS SP in Australia?
Yes. Retrofit sells professionally refurbished and modded Game Boy Advance SP consoles for Australian enthusiasts. Check the exact console specification rather than assuming every edition includes identical modifications.
Should I modify an original SP or buy a completed console?
Modify your existing SP when retaining that particular console matters; choose a completed console when avoiding installation is the priority. Preserve an untouched example if factory originality is your main collecting goal.
One last thing
Ask for a photograph of the finished screen running a familiar game, not just the console switched off. A shell photograph cannot show screen alignment, colour presentation or a working brightness control.
For a 2026 purchase or upgrade, make your final decision from the exact specification and completed-console checks. Retrofit’s Game Boy Advance SP options suit players seeking refurbished hardware, but the right choice still depends on whether you want to preserve your own console or replace it.